

As a 3ds flashcard, Sky3ds+ 2019 is still the best one to use for hacking 3DS games, but if we have the Nintendo Switch, can we still use it? If we can’t, is there any way to play 3ds games on Switch or just crack the Nintendo Switch? I do research and get the following answer.
Can Sky3ds+ work on Nintendo Switch?
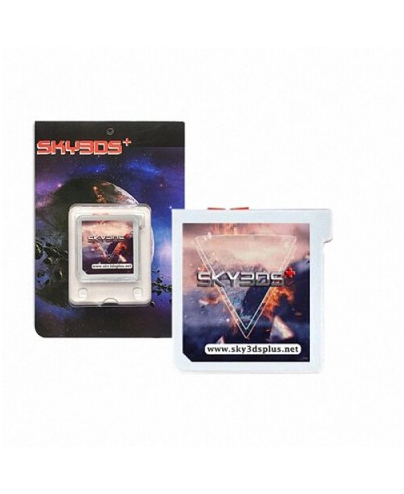
Sky3ds+ is a 3ds flash card, means a flash cartridge works on Nintendo 3DS system handhelds. The Nintendo Switch uses a totally different OS, it’s a new video game console released after the 3DS, so the Sky3ds+ can’t work on it. In 2019, Sky3ds+ card is still only working on 3DS, 3DS XL, 2DS, NEW 3DS, NEW 3DS XL and NEW 2DS XL machines.
It’s fully compatible with 3ds firmware from v1.0 to v11.9 and to any other 3DS update, but will Never support Nintendo Switch. And you can’t use it on the old NDS/DS Lite/DSI XL devices too.
What can we do with Sky3ds+ 2019 3ds card?
In 2019, Sky3ds+ is able to do the 5 things on all your 3DS firmware consoles.
Play Free Nintendo 3DS Games.
Users have the Sky3ds+ or Sky3ds plus is no need to buy most 3DS Game Cards, you can just download free .3ds roms from an online site, and then they can play them on your console for free.
Support Multi-3DS Roms.
Users only need to prepare a micro sd card for your Sky3ds+ flashcart, so it can hold and load multiple 3ds roms on your console, One card for 100+ 3ds games.
Bypass Region Lock.
Users can use Sky3ds+ card to homebrew 3DS with the help of homebrew exploit, such as Ninjhax, then they can use the region free tool in the Homebew menu to play cross-region 3ds games.
Emulate GBA/SNES/NES and other Retro Games.
After users homebrews their consoles, they can download GBA/SNES/NES roms to the 3DS SD CARD and run the Emulator in Homebrew menu to play the old classic retro games.
Go Online Safely.
Users can play 3ds games online safely with Sky3ds+ card and its exclusive tool Skydock, No Ban.
How to play 3DS Games on Nintendo Switch in 2019?
In 2019, the Nintendo Switch is already cracked, but we still can’t play 3DS Games on the console, No 3ds emulator for Switch and no such flashcart to use at the same time. Nintendo Switch can be hacked to play free Switch games, NDS games, Gamecube games, N64 games, PSP games and much more, but still not for 3DS Emulation. If you want to play other games on Switch, just follow the guide, if you only want to play 3DS games, then just buy yourself a Nintendo 3DS or use the 3DS Emulator for PC-Citra3ds.
Step 1: Check your Switch is hackable or not
Go to this site to view ismyswitchpatched.com to check whether or not its hackable or not.
Step 2: Buy yourself a modkit tool-Xecuter SX Pro, the easiest way to hack your Switch
Buy the Xecuter SX Pro from official sites, such as the Italian one – Italiamods, the Spanish one-NXmodificar.com.
Step 3: Boot SX OS CFW on Switch with the SX Pro Dongle and RCM Jig
- Extract SX OS to your Nintendo Switch’ microSD card. Your card microSD can be formatted as FAT32 or exFAT.
- Insert SX Pro dongle and tool into your Nintendo Switch. The dongle goes in the charger port, the tool in the right joycon rail.
- Hold volume up and press the power button, SX OS should start. You can remove the dongle and tool once SX OS starts.
- Activate your SX OS License to enjoy all features.
Step 4: Install Retroarch on Nintendo Switch
- Download the RetroArch 7z file for Switch (download link above http://retroarch.com/?page=platforms).
- Extract its contents and just drag and drop retroarch and the switch folder onto the root of the SD card.
- Open Hbmenu, and start RetroArch.
IMPORTANT: Please start RetroArch Switch with a fresh install (in case you already had RetroNX installed before) and migrate savegames from /retroarch/cores/save{files, states} to the same folder on the new installation.
Step 5: Play games on your console
- To locate and install the RetroArch.NSP file, scroll to the Installer section of the SX OS Menu and find the RetroArch Icon.
- Now simply hit “A” and install the RetroArch.NSP file to either the internal NAND storage or external microSD card.
- After the installation is completed, you can return to the home screen and the RetroArch icon should have been added to the grid.
- Now, simply open up the RetroArch app and you will be greeted by the Main Menu interface, which looks a lot like the Switch Settings menu.
- Before we can play our games, we have to select the core on which the game runs. In the case of Nintendo 64 ROMs, this is the Mupen64Plus core.
- To enable this core, go back to the Main Menu and go to the option “Load Core”. Then, scroll down until you see “Nintendo – Nintendo64 (Mupen64Plus)” and select this core.
- Finally, we can locate the ROMs of the games we have placed on our microSD card.
- In my case, I’ve created a folder called “ROMS” on the root of my SD. Go back to the Main Menu first and click on “Load Content”. Then select the forward slash symbol (/) and select the folder you’ve placed your ROMs in.
- You will see the games compatible with the previously selected core listed here. Since I have transferred Super Mario 64 and Mario Kart 64, these ROMs show up for me.
- Once you’ve selected the game you want to play, RetroArch will boot this game with the selected core (Mupen64Plus in this case). Now you can finally enjoy the best N64 games straight from your Nintendo Switch, enjoy!